Understanding Long Exposure Photography
Long exposure photography is a fascinating art form that allows you to capture time in a single frame. Imagine watching a scene unfold gradually, capturing the essence of motion and light in ways that the human eye cannot perceive. This technique involves using a slow shutter speed, which enables the camera sensor to gather light over an extended period. While it may seem simple in theory, mastering long exposure photography involves understanding various elements like lighting conditions, subject movement, and equipment setup. As you delve deeper into this realm, you will realize the endless creative potential it offers.
One primary aspect of long exposure photography is the way it transforms ordinary scenes. For instance, rivers or oceans appear silky smooth, while clouds stretch across the sky like wispy brushstrokes. This technique emphasizes the contrast between moving and still elements, providing a captivating visual balance. The beauty lies in the artist’s ability to convey emotions and ideas through the captured image, making it a potent medium for creative photography. Salient landscapes or bustling city streets can take on a surreal quality, proving that patience and technique reward you in mesmerizing results.
Essential Gear for Long Exposure Photography
When embarking on your long exposure journey, the right equipment plays a critical role. You don’t necessarily need the most expensive camera, but certain features make the process smoother and more effective. First and foremost, a camera capable of manual mode is preferable. This setting allows you to control the shutter speed, aperture, and ISO. A DSLR or mirrorless camera works best, as they offer the versatility required for long exposure photography.
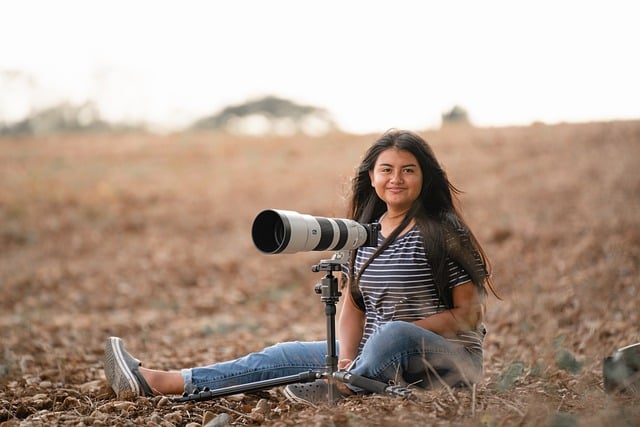
Next, invest in a sturdy tripod. Long exposures often require lengthy shutter speeds, making even the tiniest shake detrimental to the image’s clarity. A solid tripod minimizes this risk, enabling you to keep your camera stable for as long as needed. While you’re at it, consider adding a remote shutter release to your setup. This handy tool allows you to take a photograph without physically touching the camera, thus preventing any additional vibrations.
Filters also enhance your long exposure experience. Neutral density (ND) filters reduce the amount of light entering the lens without affecting color. This functionality allows you to use longer shutter speeds even in bright conditions—a necessity for capturing that dreamy water effect during broad daylight. Gradual ND filters are particularly useful for balancing the exposure between the sky and the land, ensuring no details get blown out in a sunset or sunrise scenario.
Finding the Right Location and Time
Selecting the right location is just as important as having the correct gear. Long exposure photography thrives on dynamic landscapes or bustling city settings. Think about environments that naturally possess either motion or light variation. Water bodies, for example, provide incredible opportunities. You’ll create stunning images of flowing water that reflect the surrounding landscape or city lights, especially during dusk.
Timing plays a crucial role too. The golden hour, that magical window right before sunset or right after sunrise, offers soft light that enhances colors and creates beautiful shadows. The light during this time is warm, which adds a golden hue to your images, creating a cozy and inviting atmosphere. Conversely, capturing long exposures at night can give you unique opportunities to experiment with artificial light. Street lamps, car headlights, and even star trails can create breathtaking compositions.
Mastering Techniques for Long Exposure
As you dive into long exposure photography, mastering the techniques can set your work apart. Start simple and gradually build complexity as you become more comfortable. Begin by adjusting your camera settings. A slower shutter speed—anything from half a second to several minutes—works well for most subjects. Ideally, keep your aperture small to increase the depth of field and maintain sharpness throughout the image. A higher ISO is unnecessary as a lower ISO, typically around 100 or 200, reduces noise and keeps the image clean.
Also, be mindful of composition. Use leading lines to guide the viewer’s eye through the image or showcase interesting textures that create depth. Incorporate foreground interest, such as rocks, flowers, or fallen leaves, to add context. The interaction between moving and stationary elements can be powerful. Experiment with varying shutter speeds until you find the perfect balance that conveys your vision.
Long exposure photography is not just about capturing motion—it’s about storytelling. Think about what you want to express through your image. Use creative potential to portray feelings such as tranquility, energy, or mystery. Every choice, from subject selection to post-processing, should align with your narrative. By embracing this approach, your long exposure shots transform from mere photographs into evocative pieces of art.
Post-Processing Your Long Exposure Images
Once you’ve captured your long exposure photographs, the work doesn’t stop there; post-processing is where you can truly elevate your images. Popular editing software like Adobe Lightroom and Photoshop allows you to enhance colors, adjust contrast, and fine-tune exposure. Start by assessing the histogram; ensure the whites are bright but not blown out and the blacks maintain their depth. Next, you can adjust the sliders to unleash the potential of your image by brightening shadows, deepening highlights, or adding clarity where necessary.
Applying a subtle vignette effect might enhance focus on the central subject, while sharpening the image can bring out finer details. It’s essential to be cautious—over-processing can detract from the story your image tells. Aim for natural enhancements that maintain the photograph’s authentic essence. Finally, consider cropping if needed, to refine your composition and draw the viewer’s eye to the most important elements.
Experimenting with Creative Techniques
Once you’ve got the basics down, long exposure photography opens the door to a world of creativity. Introducing unconventional techniques can lead to stunning results. For example, try panning during a long exposure. This technique involves moving the camera with a moving subject, creating a sharp focus against a blurred background. It’s particularly effective for capturing fast-moving subjects, like cars racing by or a spinning carnival ride.
Light painting stands as another fascinating technique. In this approach, you “paint” light into the frame using flashlights or other light sources during a long exposure. It creates stunning, ethereal effects as if the image comes alive with movement and color. This method allows complete control over the mood and message, blending a tactile experience with stunning visuals. Feel free to experiment with different light sources or colors to find what resonates with your artistic vision.
Additionally, consider capturing star trails by using long exposure techniques over several hours. Mount your camera on a sturdy tripod and point it toward the night sky. A long exposure setting (perhaps around 30 minutes to several hours) will illustrate the stars’ paths, creating captivating trails that showcase the Earth’s rotation. Blending various techniques seamlessly allows you to cultivate a unique style that represents your journey through long exposure photography.
Common Challenges in Long Exposure Photography
Long exposure photography isn’t without its challenges; understanding these hurdles will help you navigate them more effectively. One common issue is dealing with changing light conditions. As the sun sets, the environment rapidly shifts, and what started as a well-exposed shot can quickly become overexposed or underexposed. To counter this, plan accordingly—arrive early and have your settings dialed in. Monitor the histogram closely, and adjust exposure settings as the light changes.
Another challenge involves subject movement. While capturing flowing water often results in breathtaking softness, other moving subjects, such as trees swaying in the wind, can become blurry in unintended ways. Using advanced filter arrangements or shooting on calm days helps mitigate this issue. If you aim to capture less motion on a windy day, pick sheltered spots where the wind is minimal.
Additionally, noise becomes a factor in extended exposures. As you increase exposure time, particularly over several minutes or hours, the camera’s sensor gathers more heat, which can introduce noise. Utilizing noise reduction settings, shooting in RAW format, and processing files in post-production can help maintain image integrity while minimizing unwanted artifacts.
Conclusion: The Constant Journey of Long Exposure Photography
Long exposure photography is an evolving discipline that encourages experimentation and creativity. Each snap of the shutter offers a new dimension to explore. As you dive into this incredible practice, embrace the challenges and triumphs along the way. Every moment spent practicing will enhance your skills and broaden your creative perspective. Your artistic growth will shine through your long exposure work, allowing you to share your unique visual narratives with the world.
FAQ
1. What is long exposure photography specifically?
Long exposure photography captures images with a longer than usual shutter speed, enabling cameras to collect light over extended periods. This results in smooth motion effects, such as soft water or dynamic clouds, and emphasizes the interplay between movement and stillness.
2. Do I need expensive equipment for long exposure photography?
No, you don’t require the most expensive gear, but having a camera with manual settings, a sturdy tripod, and neutral density filters greatly enhances your experience and results.
3. How do I reduce noise in long exposure photographs?
Reducing noise can be achieved by using a lower ISO setting, taking photos in RAW format, and employing noise reduction techniques during post-processing. It’s essential to monitor your exposure times to minimize noise buildup.
4. What settings should I use for night long exposure photography?
For night photography, use a low ISO (100-200), a small aperture (f/8 or smaller), and experiment with longer shutter speeds, often ranging from several seconds to minutes, depending on the brightness of available light.
5. Can I combine long exposure photography with other techniques?
Absolutely! You can combine long exposure with other techniques such as panning, light painting, or capturing star trails. Blending methods enhances creativity and allows you to develop a unique photographic style.


